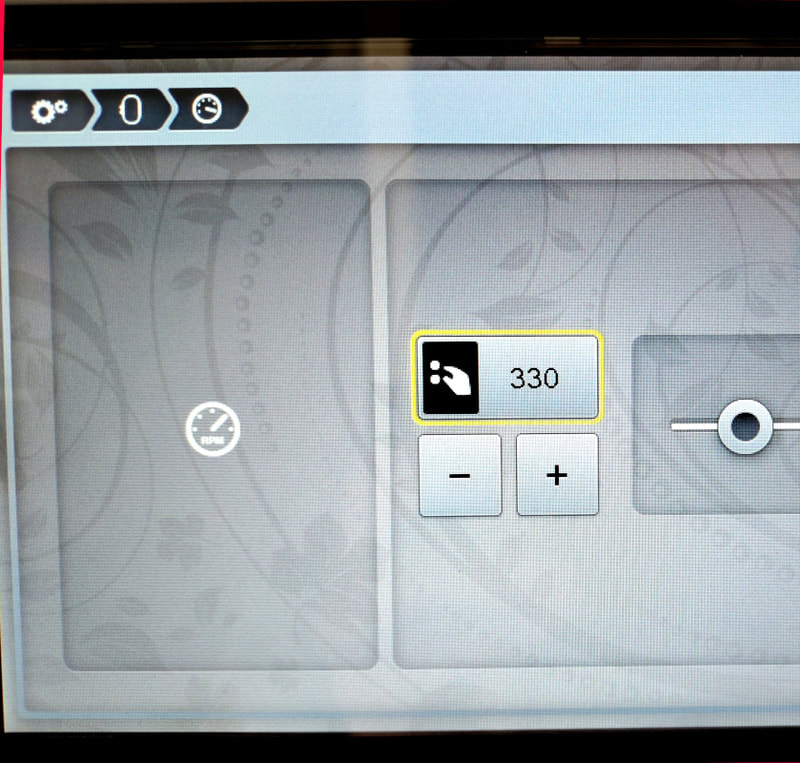
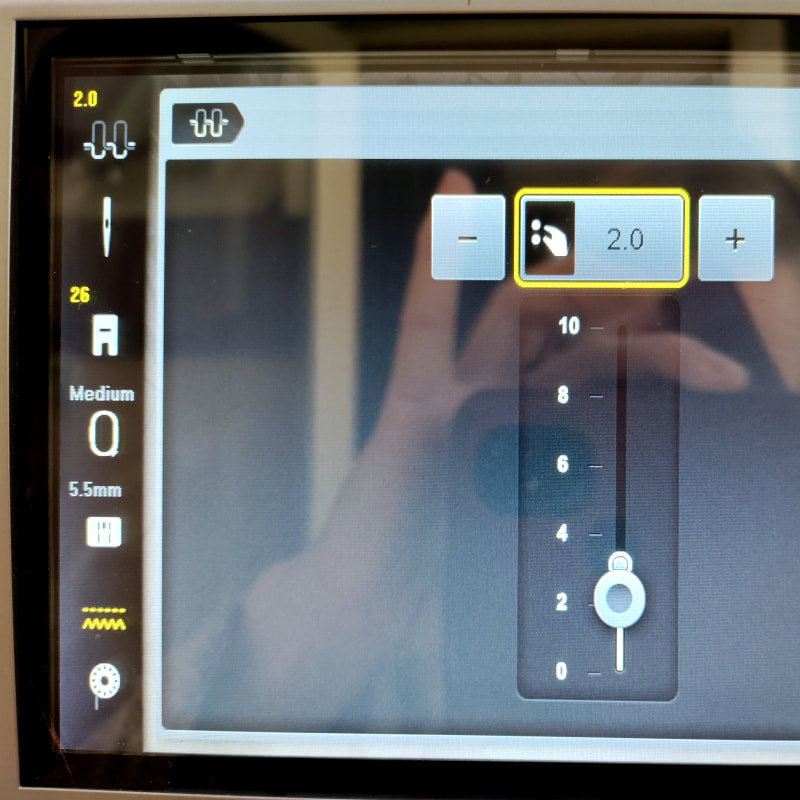
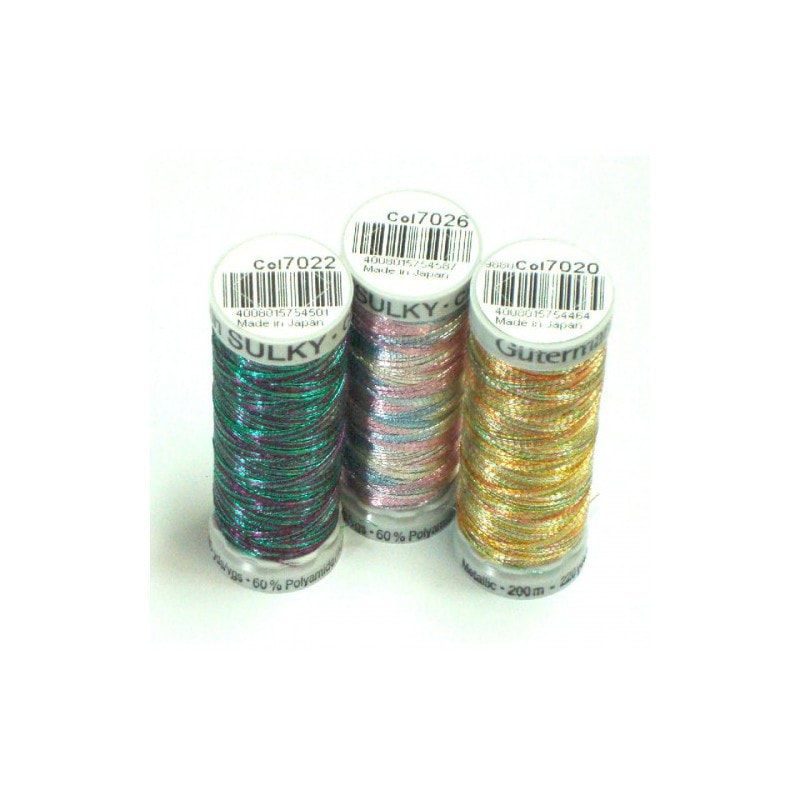
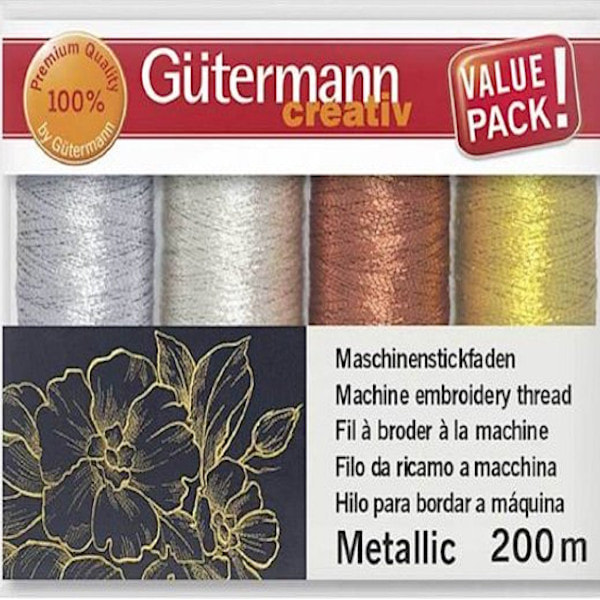
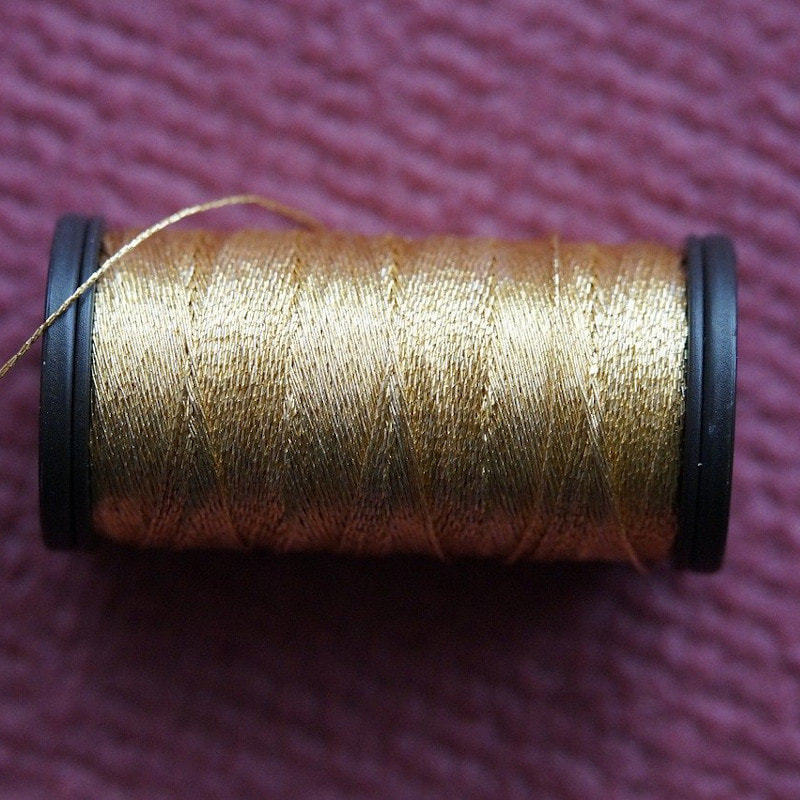
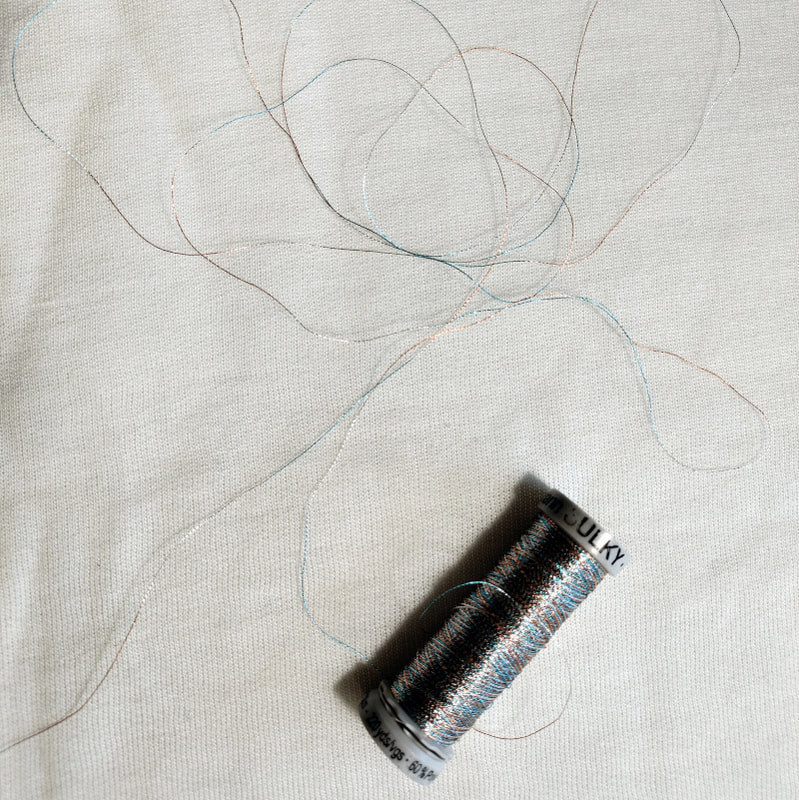
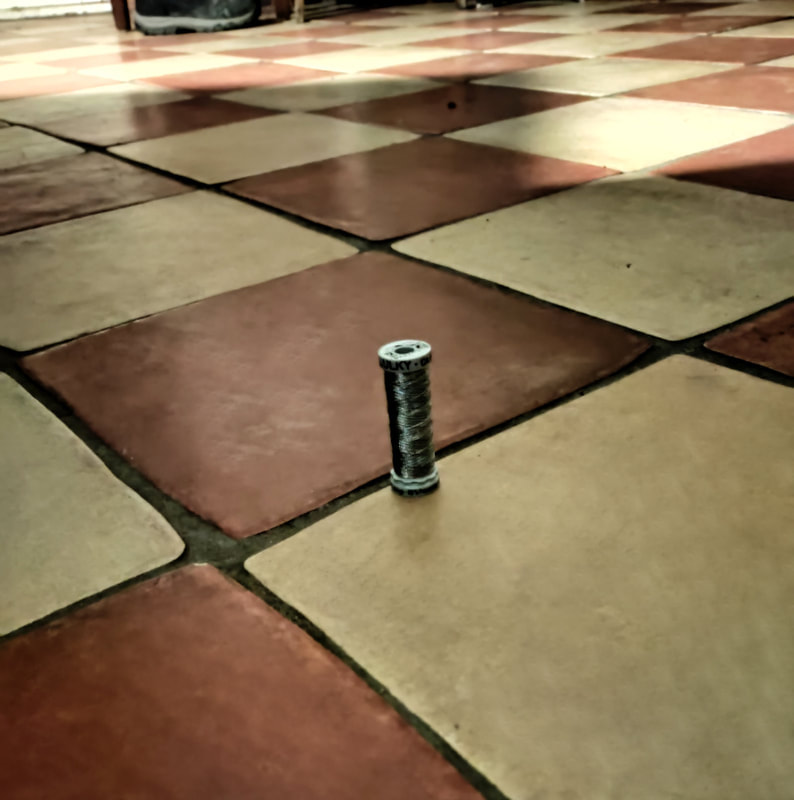
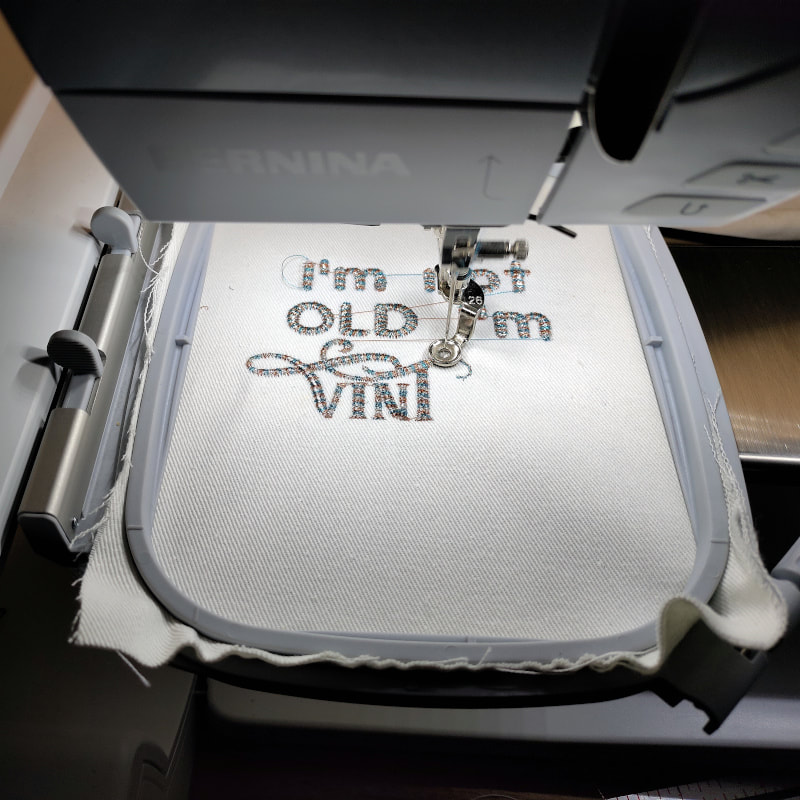
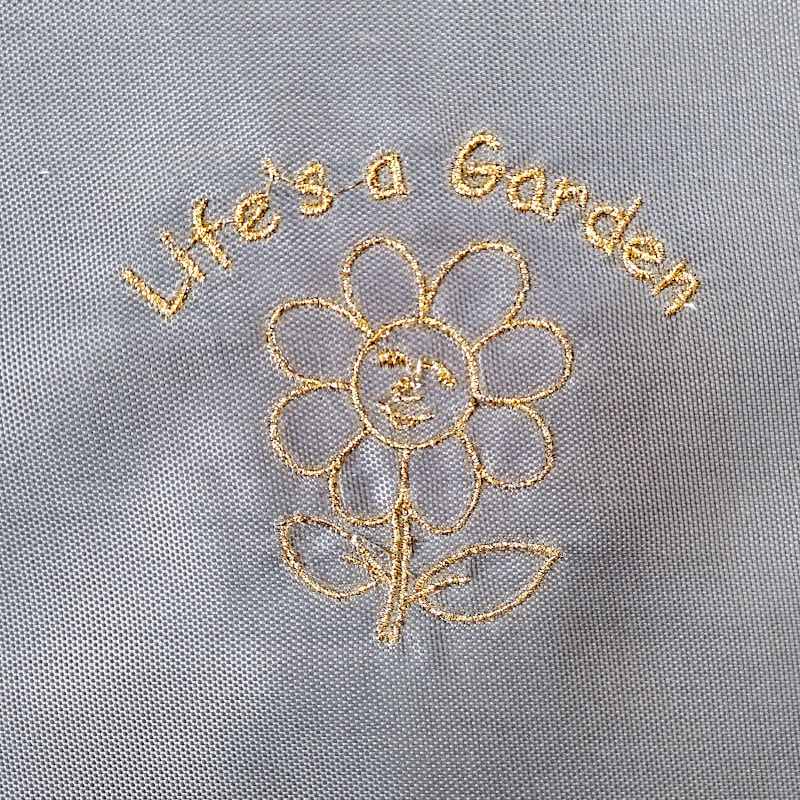
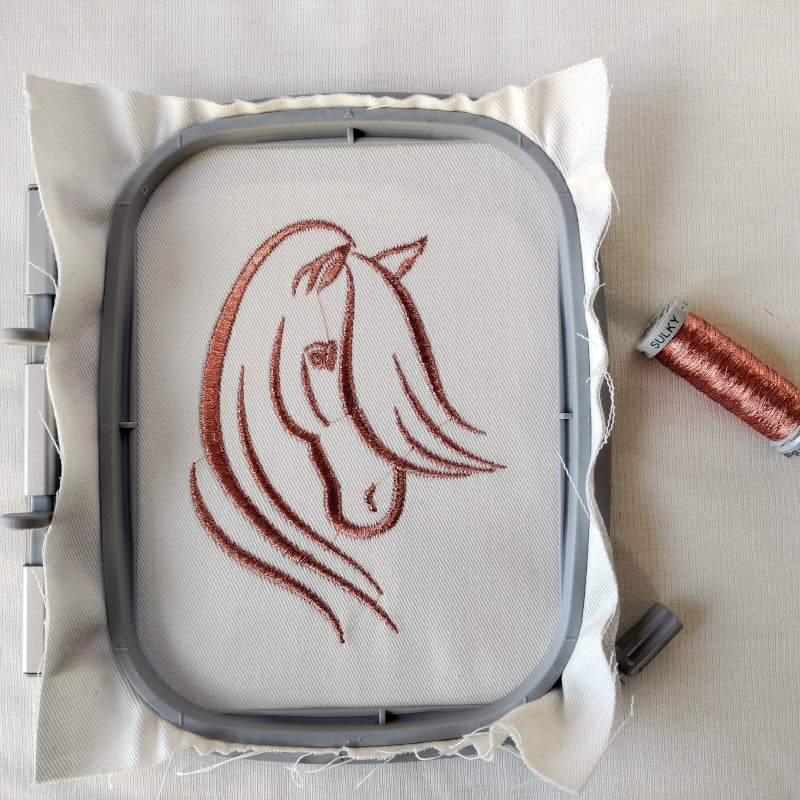
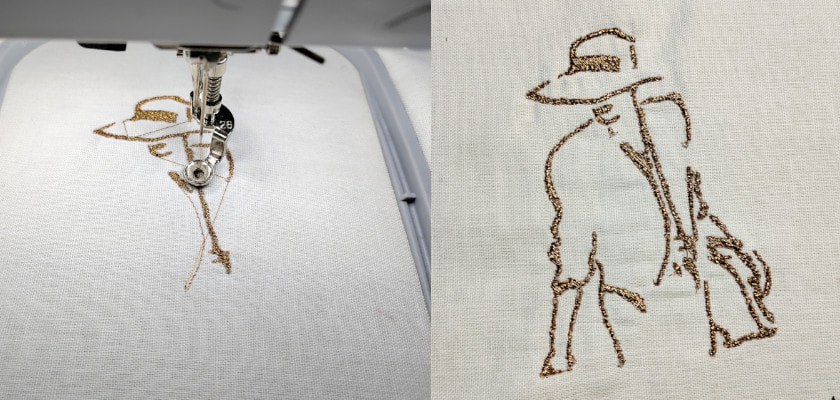
 Embroidery with the sewing machine is addictive! Once you start embroidering you will never want to stop. That's also because of all the beautiful embroidery patterns for sale (or FREE!) and the beautiful colors of embroidery thread. But even more beautiful are the metallic embroidery threads. But there is a problem: these threads often go wrong when you use them for embroidery patterns. What is the cause of threads keeps breaking and how can you prevent this? Read the tips & tricks! 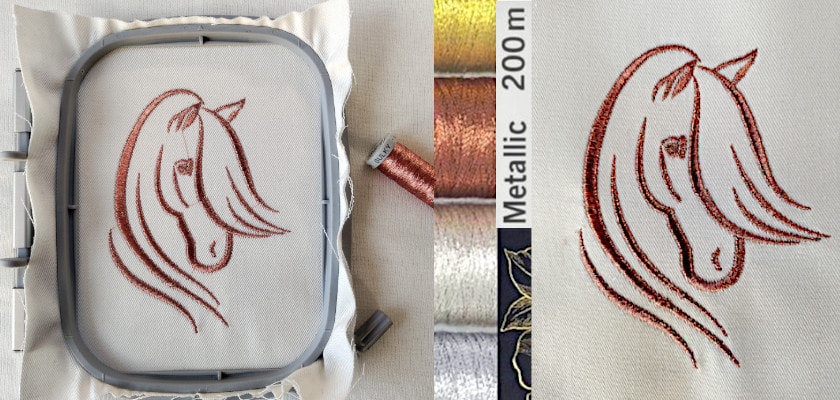 TIPS & TRICKS: 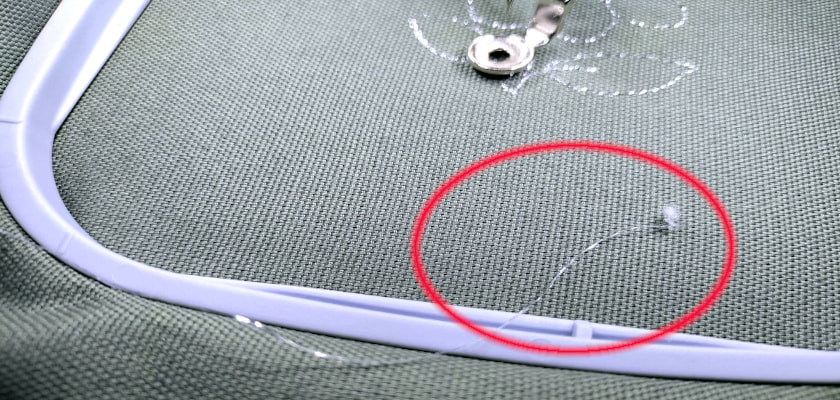 Why does metallic threads keeps breaking? This is because metallic threads usually consist of two or three strands that separate very quickly. With cheap metallic threads, one of those threads is often a more transparent polyester thread. This curls and often makes knots (see photo above). Soon you get a ball and the thread breaks off. With more expensive yarn, the threads are made of thin metal foil/silver foil. This breaks less quickly, but has the disadvantage that they can 'wrinkle' and curl during the unwinding of the roll. Think of it as a garden hose that doubles, you suddenly have an annoying obstacle. With metallic threads, this leads to a tiny knot or knot, causing it to jam in the sewing machine and then break. How do you prevent metallic threads breaking? Fortunately, there are a few points that you can pay attention to. To prevent the thread from breaking and your embroidery project from being a fiasco. 1. Sewing and Embroidery Machine Preparation: You can prepare well for a metallic thread embroidery by changing a few settings on your sewing and embroidery machine. Speed: If your sewing machine offers that option, lower the embroidery speed considerably. From 1000 stitches per minute to, for example, 300. See photo 1. The job will now take much longer, but the chance that the thread will not curl and break is much smaller. Tension: Also turn the top tension down considerably. See photo 2. In principle you do not need to touch the bobbin thread. But reducing the tension on the metallic threads can go a long way in preventing the yarn from breaking. Embroidery frame: As usual: make sure to use a good fleece line so that the piece of fabric is reinforced before embroidering. Stretch the fabric extra tight. Needles: Use a topstitch needle. It has a larger opening because a topstitch is usually sewn with thicker thread. Due to the larger opening, metallic threads are less likely to fray or curl. 2. Quality Of Metallic Yarn: Buy good embroidery threads even if it is a lot more expensive. Maybe you can keep an eye on offers, ask package-gifts on your birthday or swap colors with other seamstresses. It is better to pay a few euros more for good yarn than to buy cheap metallic threads. Do you doubt the quality of the yarn? Ask if you can see a few inches of wire. You will soon see whether it curls apart quickly or whether the threads remain fairly close together. 3. The threads winding and the distance: As you can see in photo one, metallic yarn is really different from regular yarn. It unwinds, curls into all corners and soon it makes a mess of the thread. As you can see in photo two, the bobbin is on the floor. Normally in an open jar, so that the yarn does not roll away, but on the floor for the photo. The purpose of this is to increase the distance to the sewing machine. By at least one meter of thread before you reach the sewing and embroidery machine, you have less chance of the threads curling and knotting. Again, think of the garden hose as a metaphor. The longer the hose, the less chance that the garden hose will fold over when cornering. So put the yarn in a jar on the floor, in a cupboard or on the table at least a meter away. You can also hold the threads and guide it slowly. But because the speed of the embroidery has already been adjusted, there is a chance that you will have to stand next to your sewing machine for a very long time... Still, the latter is not a bad idea. Carefully guiding the yarn can prevent a lot of frustrations. So keep a cup of coffee nearby, your mobile or a book. The good result is really worth it. 4. DO NOT Scaling the Embroidery Patterns: Most sewing and embroidery machines have the ability to scale the patterns, meaning you can make them smaller and larger. This is not a good idea with metallic threads. There is a good chance that the stitches will then be too crammed together (with reduction) or too far apart (with enlargement). Therefore, it is better to look for embroidery patterns that match the appropriate embroidery frame. Do you have a midi or mega embroidery frame? Then look for the right patterns. If you have a mini or small embroidery frame, look for patterns that are suitable for this embroidery frame. You can enlarge or shrink a bit to get it to fit, but in the case of metallic threads: rather look for a pattern than 100% fit. 5. Patience & Practice Embroidery with metallic threads will be a lot more difficult than embroidery with normal embroidery yarn. Even if you have taken all of the above tips seriously. It also remains a matter of feeling which surface as fabric is best, which pattern 'matches' well with metallic yarn and how you can best ensure that the yarn roll unwinds properly without fraying, curling or knotting. Make a lot of tests, see which interfacing works best and pay attention to the tension and speed of the sewing machine. Practice makes EMBROIDERY art Practice makes EMBROIDERY art. If it really doesn't work out, put the metallic yarn away for a while and pick your project up again with normal embroidery thread. In the long run it will really go well, but that just takes a little more time and patience...
Comments are closed.
|
All about creating your own Chanel-Style jacket, Chanel-lovers information, Historic Costumes, Couture & Sewing book reviews and tutorials.

By: Marga van der Vet,
50+ model
Content creator

|